Integration overview
Connect Cursor IDE to DexPaprika via the hosted MCP server and add docs for rich AI context.What is Cursor IDE?
Cursor is a powerful AI-first code editor built on top of VS Code that provides advanced AI assistance for developers. With its built-in Claude integration and MCP (Model Context Protocol) support, Cursor can access external data sources and documentation to provide more intelligent coding assistance.Why integrate DexPaprika with Cursor?
Integrating DexPaprika documentation and data with Cursor IDE provides several powerful benefits:- Real-time crypto data access - Get live market data, pool information, and token prices while coding
- Enhanced AI assistance - Cursor’s AI can reference DexPaprika documentation and data for better code suggestions
- DeFi development workflow - Build DeFi applications with direct access to comprehensive blockchain data
- Documentation context - AI can reference our API docs, tutorials, and examples while helping you code
Step 1: Install MCP server with one click
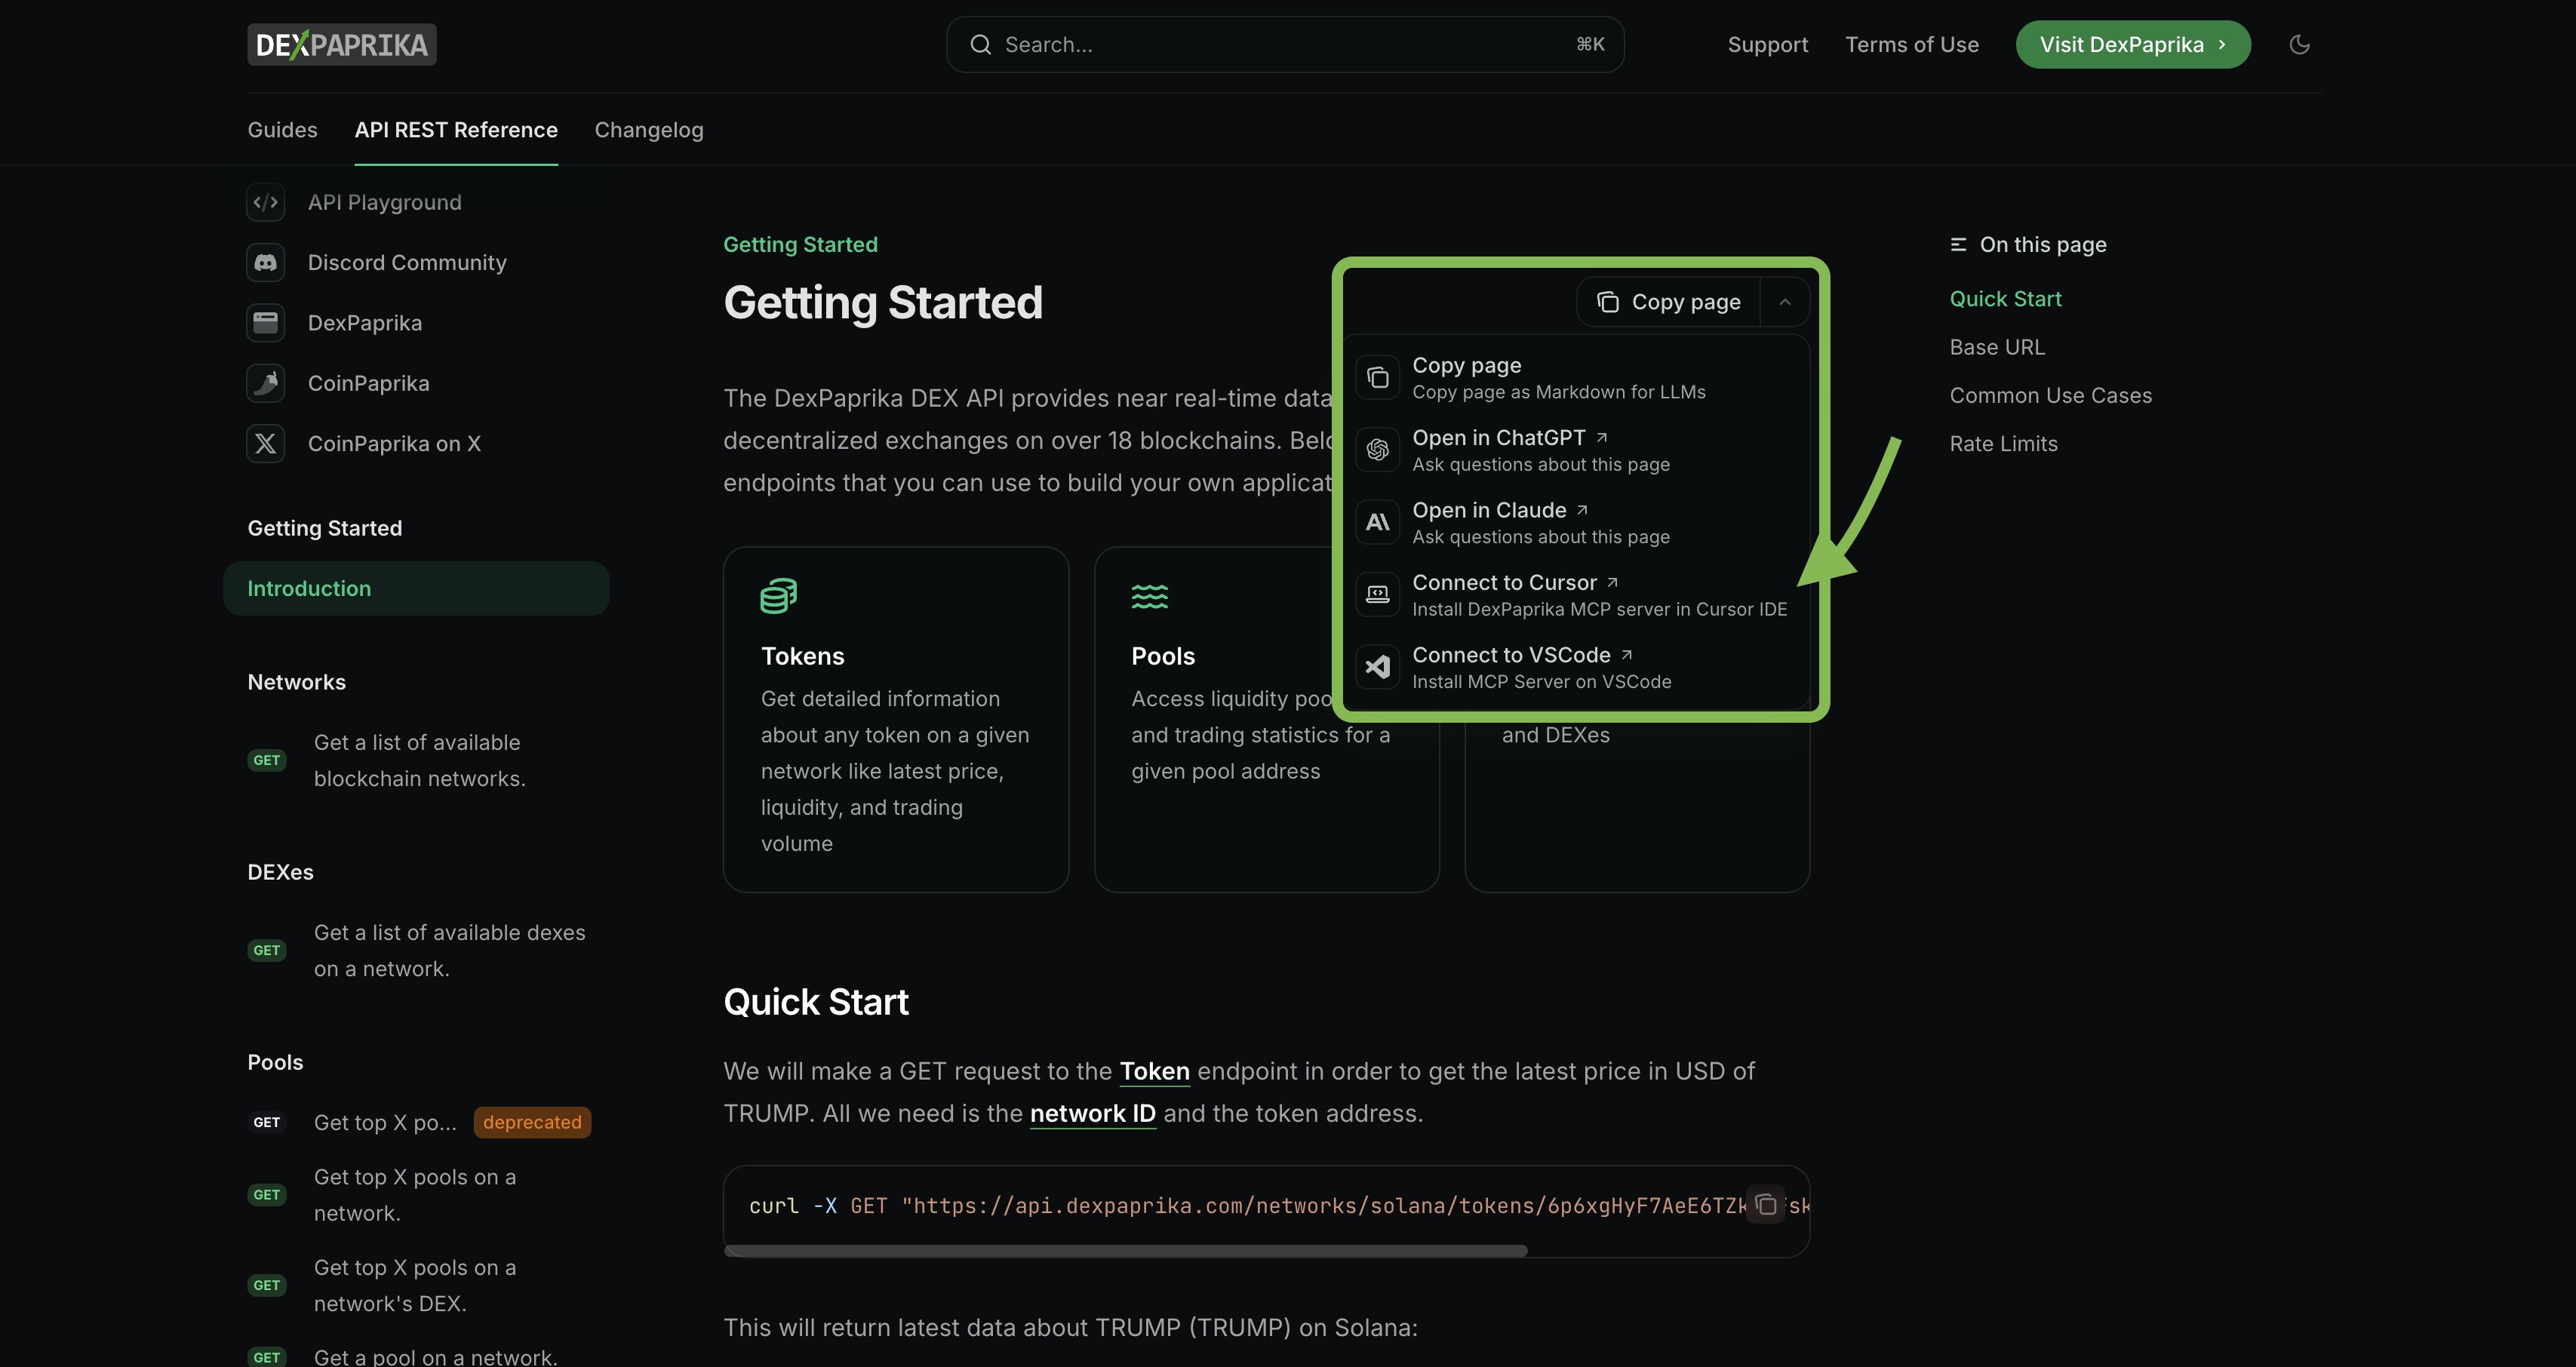
The easiest way to get started is using our “Connect to Cursor” button that opens Cursor IDE for MCP server installation.Find the Connect Button
- Look for the “Connect to Cursor” button in our documentation
- This button is available on relevant pages throughout our docs
- Click the button to open Cursor IDE
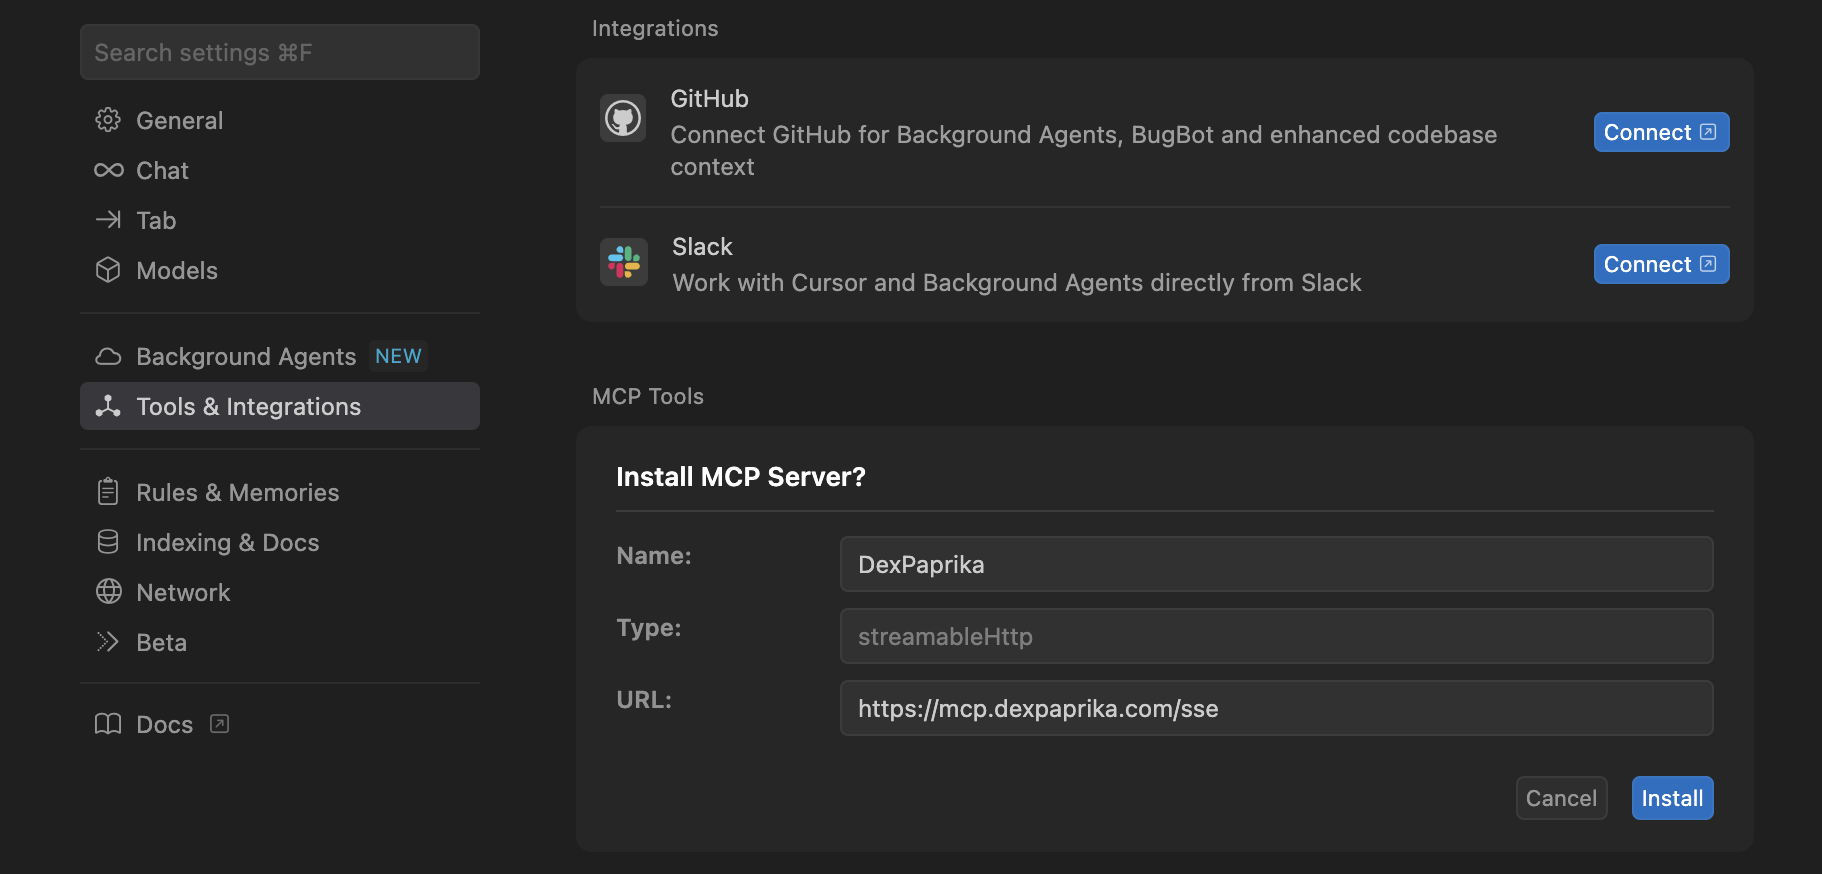
Configure MCP Server URL
- The button will open Cursor IDE (if not already open)
- In the MCP server configuration dialog, enter the DexPaprika MCP server URL:
- Click “Install” to complete the setup
- Restart Cursor if prompted to complete the setup
Can’t find the button? The “Connect to Cursor” button appears on pages where MCP integration is relevant. If you don’t see it, you can also manually configure the MCP server using the method below.
Step 2: Add documentation context
Once you have the MCP server installed, enhance your development experience by adding our documentation to your Cursor workspace for full API reference indexing.Open Cursor settings
- In Cursor, go to Settings (Cmd/Ctrl + ,)
- Navigate to Indexing & Docs in the left sidebar
- This section allows you to add custom documentation for AI context
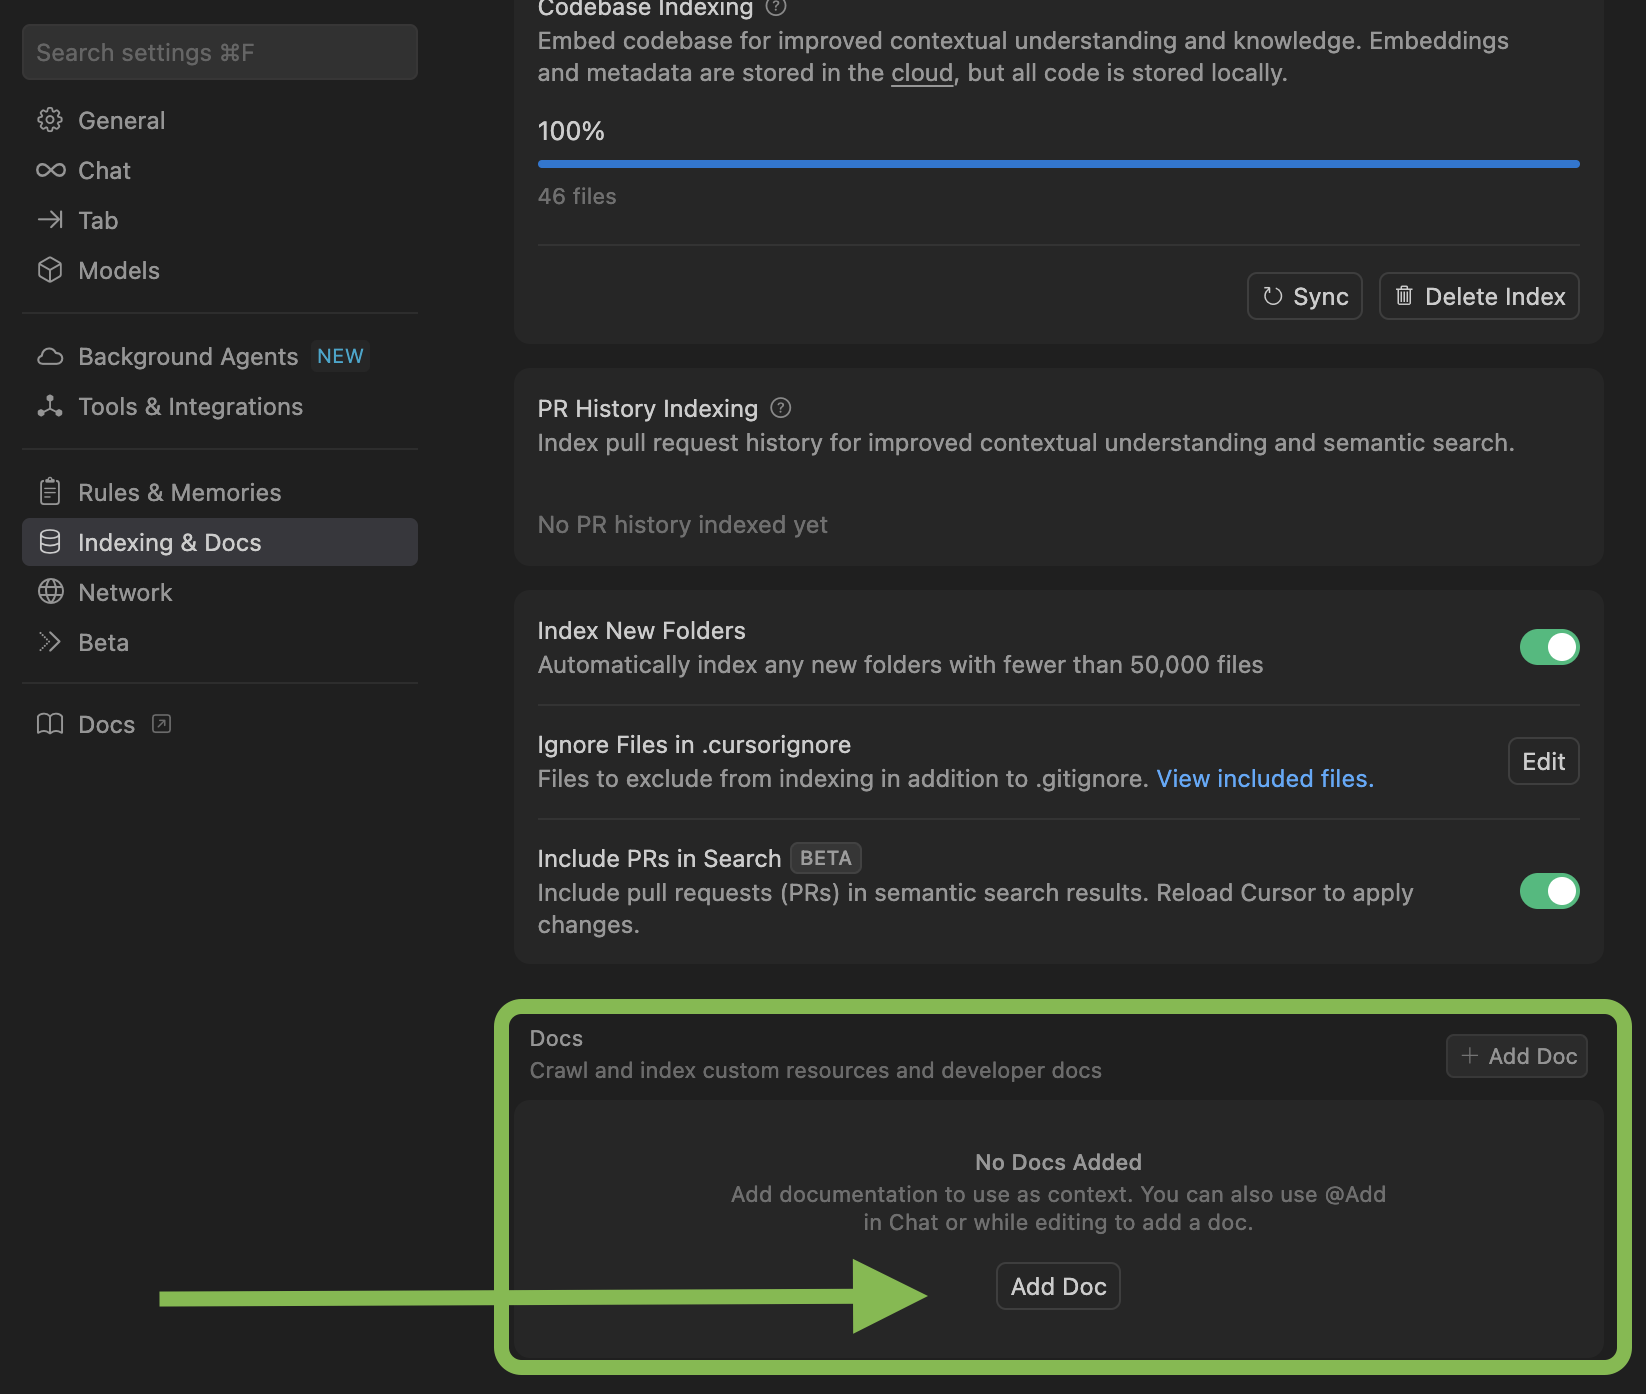
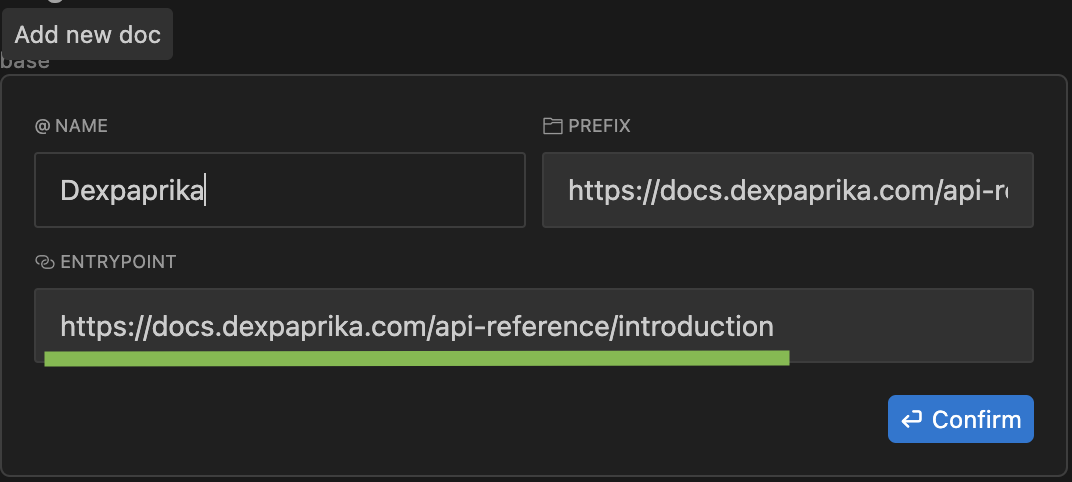
Add DexPaprika documentation
- In the Docs section, click ”+ Add Doc”
- Fill out the documentation details:
- Name: “DexPaprika API Reference”
- URL: https://docs.dexpaprika.com/api-reference/introduction
- Click “Add” to complete the setup
- This will index our full API reference for AI context
Manual MCP server configuration
If you can’t find the “Connect to Cursor” button or prefer manual setup, you can configure the MCP server manually by following our hosted MCP server guide.Need help with manual setup? Our hosted MCP server guide provides detailed instructions for configuring the DexPaprika MCP server in Cursor, Claude Desktop, and other MCP-compatible tools.
Available features
Once integrated, you can access comprehensive DexPaprika functionality within Cursor:Real-time data access
- Network information - Get details about supported blockchain networks
- DEX data - Access decentralized exchange information and metrics
- Pool analytics - Real-time liquidity pool data, volumes, and fees
- Token information - Current prices, market data, and token details
- Search functionality - Find tokens, pools, and DEXes across networks
Documentation context
- API reference - Complete endpoint documentation and examples
- SDK guides - Language-specific integration tutorials
- Best practices - Coding patterns and optimization tips
- Troubleshooting - Common issues and solutions
Usage examples
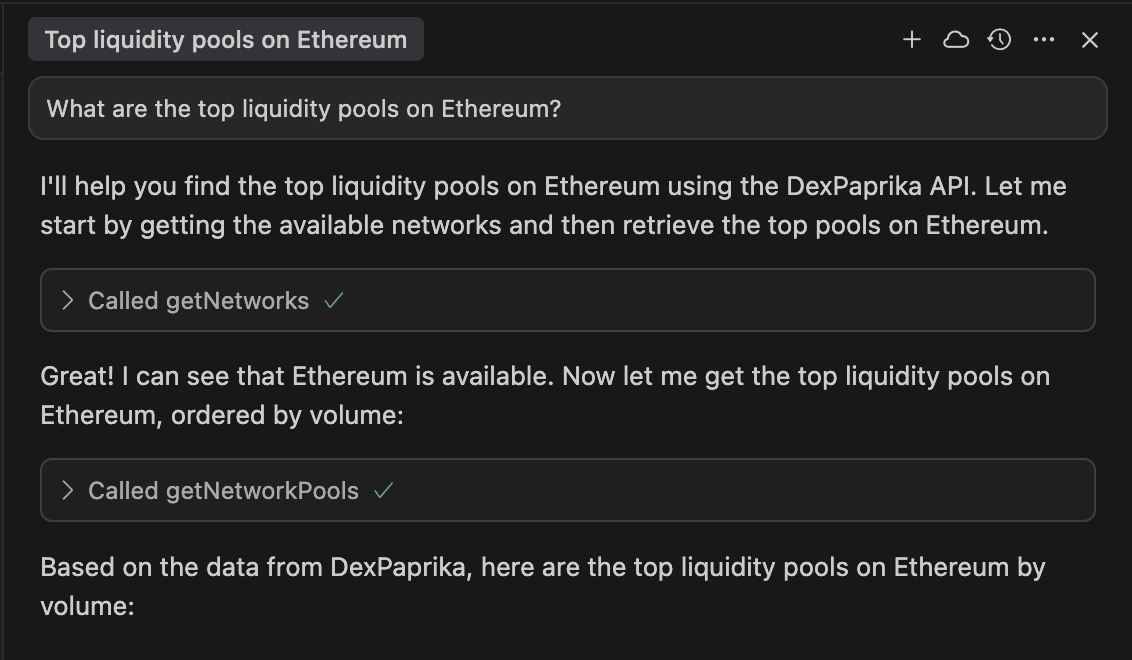
Example 1: Building a DeFi dashboard
Ask Cursor to help you build a DeFi dashboard with real-time data:- Reference our API documentation for correct endpoint usage
- Provide real-time pool data for testing
- Suggest optimal data fetching patterns
- Help with error handling and loading states
Example 2: Token price monitoring
Create a price monitoring application:- Access real-time SOL price data from multiple DEXes
- Reference our historical data tutorials
- Suggest efficient polling strategies
- Help implement price comparison logic
Example 3: Pool discovery bot
Develop a new pool discovery system:- Use our pool discovery endpoints
- Reference our “Find New Pools” tutorial
- Provide real-time pool data for testing
- Help with notification system implementation
Troubleshooting
MCP server connection issues
MCP server connection issues
Symptoms: Cursor shows connection errors or timeouts.Solutions:
- Verify internet connection is stable
- Check that the MCP server URL is correct:
https://mcp.dexpaprika.com/sse - Restart Cursor completely
- Try removing and re-adding the MCP server configuration
- Check Cursor’s console for detailed error messages
Documentation not loading
Documentation not loading
Symptoms: Cursor’s AI doesn’t reference DexPaprika documentation.Solutions:
- Ensure documentation files are in your workspace
- Enable “Use workspace files as context” in AI settings
- Try asking more specific questions about our API
- Restart Cursor to refresh context
Slow response times
Slow response times
Symptoms: Cursor takes a long time to respond with DexPaprika data.Solutions:
- Check your internet connection speed
- Try breaking complex queries into smaller parts
- Use specific network/token names in your queries
- Consider using the hosted MCP server for better performance
Authentication issues
Authentication issues
Symptoms: Getting authentication or permission errors.Solutions:
- DexPaprika API is publicly accessible - no authentication required
- Check if your network has firewall restrictions
- Try using the hosted MCP server instead of local installation
- Contact support if issues persist
Best practices
For optimal performance
- Use specific queries - Instead of “show me all pools”, ask for “top 5 USDC/ETH pools on Ethereum”
- Cache frequently used data - Store common queries locally to reduce API calls
- Handle errors gracefully - Implement proper error handling for network issues
- Monitor rate limits - Be mindful of API usage patterns
For better AI assistance
- Provide context - Tell Cursor what you’re building and your goals
- Reference documentation - Ask Cursor to explain concepts from our docs
- Iterate on solutions - Ask follow-up questions to refine the code
- Test with real data - Use actual DexPaprika data in your development
What’s next?
API Documentation
Explore all available endpoints and their capabilities
SDK Integration
Learn how to use our official SDKs in your projects
Find New Pools
Discover newly created liquidity pools and tokens
Historical Data
Access and analyze historical price and volume data
Hosted MCP Server
Zero-setup MCP integration for instant access
ChatGPT Actions
Integrate DexPaprika data with ChatGPT
Need Help?
Join Our Discord
Connect with our community for real-time support and discussions
Direct Support
Contact our team for technical assistance and custom integrations
Building something amazing? Share your Cursor + DexPaprika integrations with our community! We love seeing what developers build with our tools. Reach out to showcase your work.
FAQs
How do I add the MCP server if the button is missing?
How do I add the MCP server if the button is missing?
Docs aren’t referenced by the AI--what now?
Docs aren’t referenced by the AI--what now?
Add https://docs.dexpaprika.com/api-reference/introduction under Indexing & Docs and enable workspace context.
How to troubleshoot connection issues?
How to troubleshoot connection issues?
Restart Cursor, re‑add the server, and verify the URL; check the developer console for detailed errors.